
Add Managed Property: Complete property setup, owner details, account opening, and online signing in one go.
Quick Links
- Before starting: Select role based on property status.
- Step 1: Enter Property and Unit Details
- Step 2: Select Owner & Contract Period
- Step 3: Ledger Setup (Opening Balance & Management Fees)
- Step 4: Photos & Attachments
- Sign contract online with owner
- What will you see after completion?
- View/Modify Owner Contract
- Modify Management Fee: Property default rate and limits.
- FAQs
Before starting: Select role based on property status.
Click 'Add Property' at the top right. The system will prompt you to choose one of four options based on the property status:
- Self-managing Landlord: You own the property, sign agreements with tenants, and collect rent yourself.
- Property Management (Full Management Service): A management company assists landlords with house management: rentals, rent collection, repairs, disbursement to owners, contracts with tenants on behalf of landlords, and charges landlords a management fee or commission. The property remains owned by the landlord.
- Sublease (Full Lease): The management company rents the property from the landlord first and then subleases it to tenants, acting as both tenant and landlord.
- :
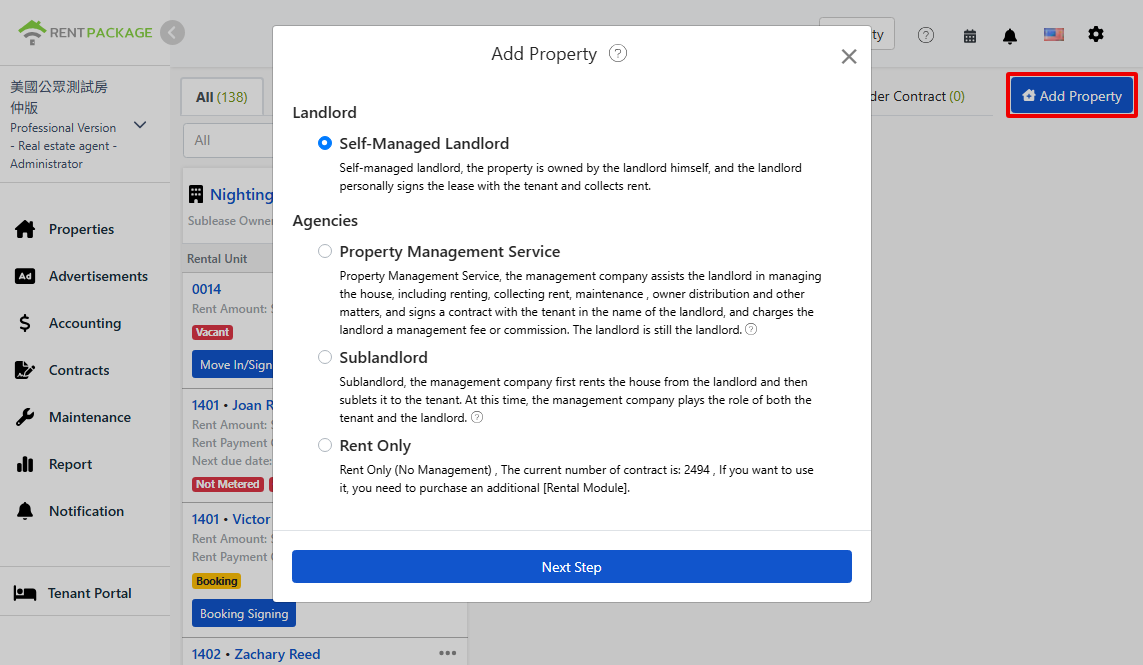
This article demonstrates the complete process after choosing property management: create properties and rooms, select owner, set up accounts and management fees, upload information, and complete online contract with owner.
Steps
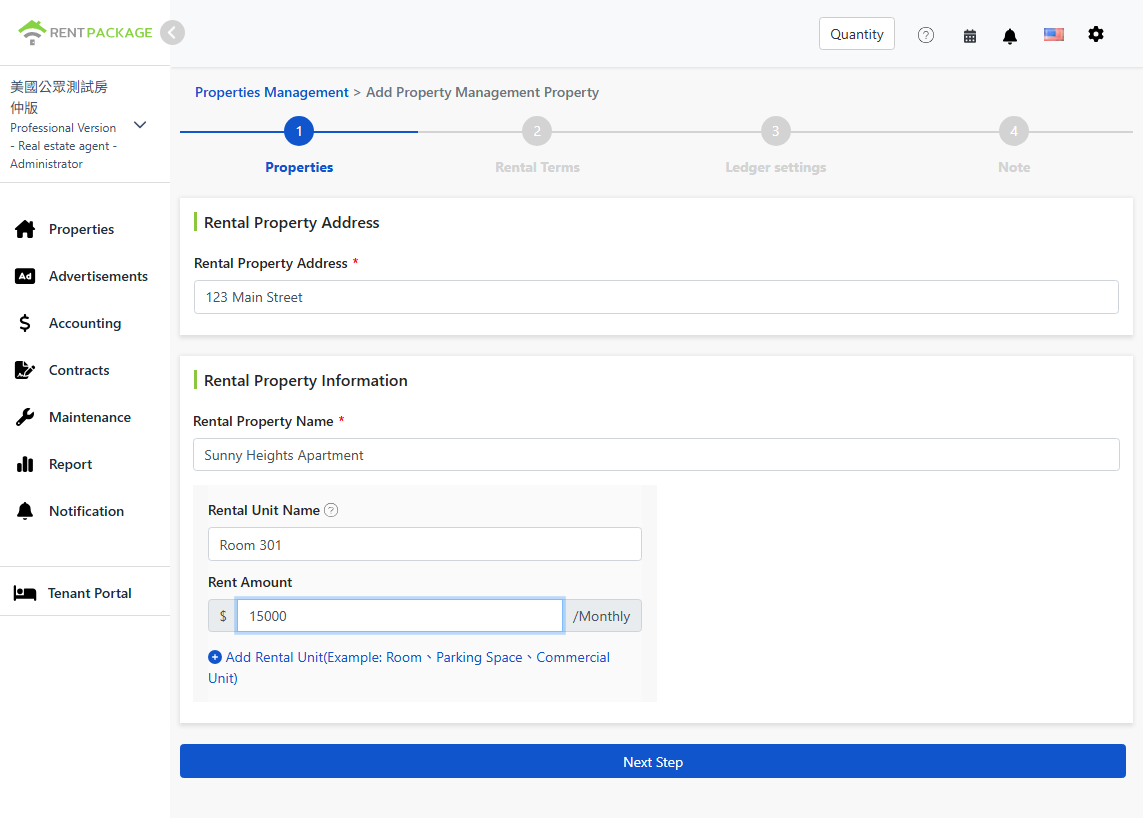
Step 1: Enter Property and Unit Details
Enter the property's basic info:
- Property Address: The property's actual address, which will automatically populate in contracts.
- Property Name: A recognizable name, such as the building or street name.
- Unit Name & Rent: One unit per line: room, parking space, or storefront. Enter name and rent. Click 'Add Unit' to continue adding.
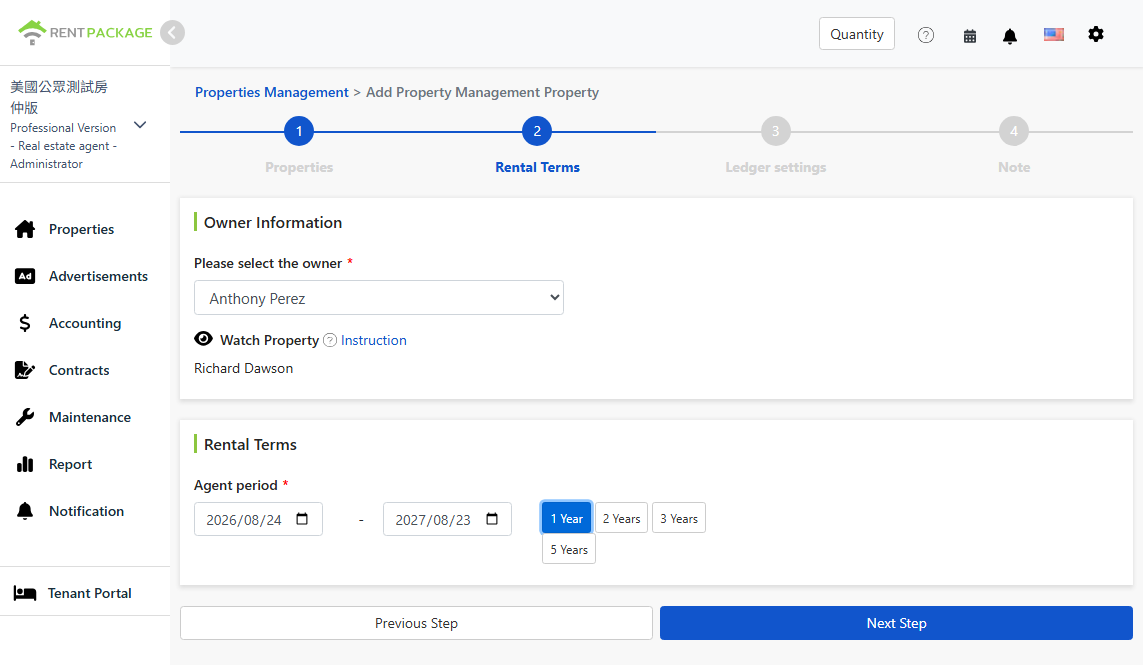
Step 2: Select Owner & Contract Period
- Select Owner: Choose the property's owner from the dropdown. If the owner isn't listed, add a new owner and enter the account for funds transfer (modifiable later in owner details).
- Follow Property: Members created for a property will automatically follow it, indicating management permissions. This can be adjusted later.
- Contract Duration: Property management period agreed with owner. Select start and end dates, or use 1, 2, 3, 5-year shortcuts.
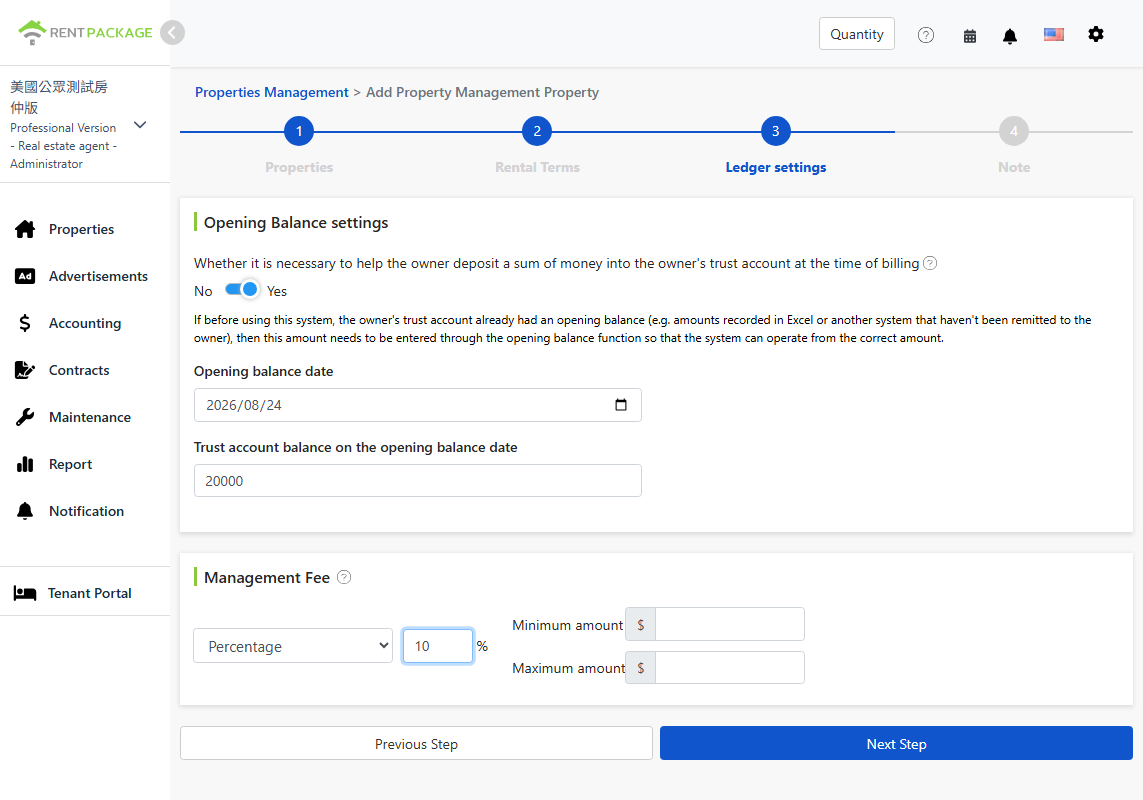
Step 3: Ledger Setup (Opening Balance & Management Fees)
Opening Balance
If migrating from Excel or another system, the owner's trust account may already have an undisbursed amount. Toggle to Yes, enter the opening date and the balance for accurate calculations, seamlessly connecting old and new accounts without back-entry.
For example: When using Excel, if there's $23,000 not yet disbursed, enter $23,000 here. The system will use this starting balance for future settlements. If starting fresh with no previous balance, keep it off.
Management Fees
Select billing method as per agreement with owner. Three options available:
- Fixed Fee: Charge a fixed amount per period.
- Percentage: Deduct based on rent percentage, e.g., 10% of rent.
- Percentage + Fixed Fee: Use percentage and fixed amount together. Enter both values.
Step 4: Photos & Attachments
- Property Photos: Upload property photos (up to 5). Enable the switch to add photos and notes to the contract. They will be included as a condition record.
- Notes: Additional instructions (up to 1500 characters), can also be attached to the contract.
- Property Listing File: Upload related documents (up to 3), like scanned signed contracts with the owner, under the property.
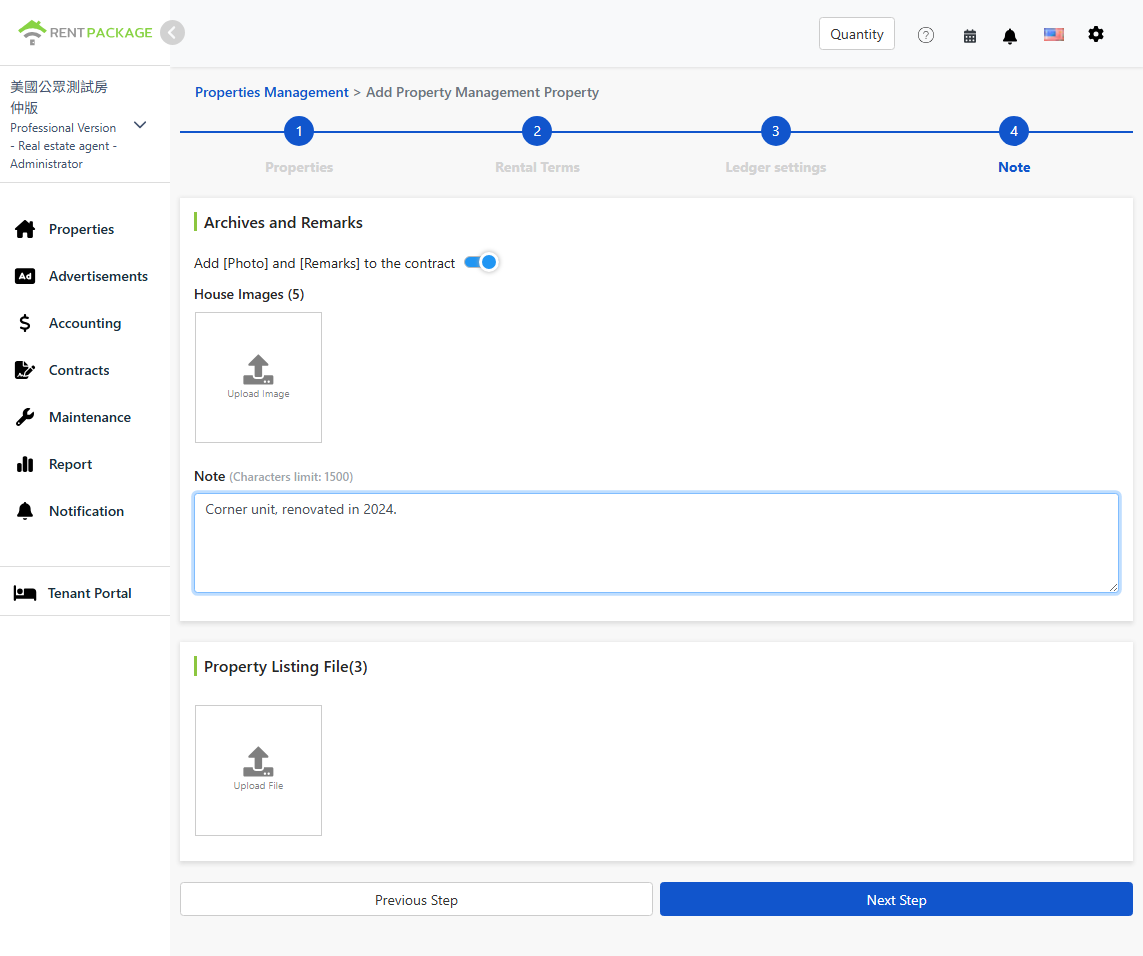
Sign contract online with owner
After clicking next, choose a way to sign the electronic contract. Once everyone signs, the system automatically generates a PDF contract for sending or download. Four options:
- Owner signs via Email: The system sends a signing notification to the owner's email. The owner can e-sign online by opening it.
- Owner signs via link: The system generates a signing link for you to copy and send to the owner via LINE or other messaging apps.
- Owner signs on-site: Use when the owner is present, assisting them to sign directly on your device.
- Add property, no contract: Select this when only recording contract info is needed, without electronic signing. A signed paper contract can be uploaded in the previous step as an attachment.
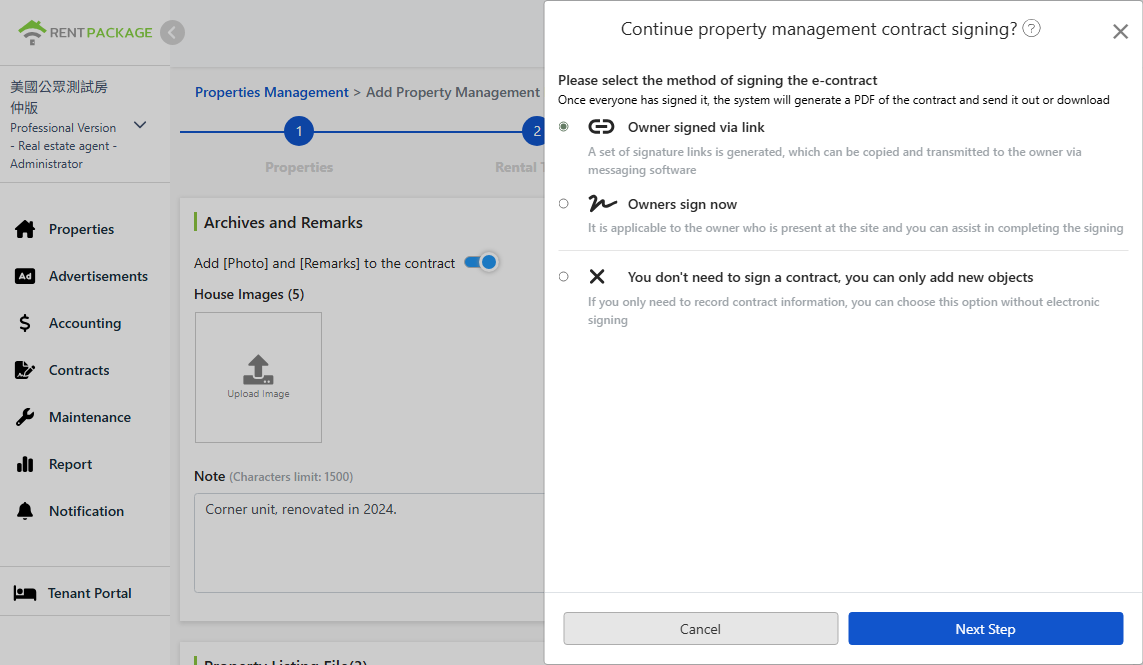
Select contract template
Choose a property management contract template from the dropdown, or click to edit the template to adjust terms.
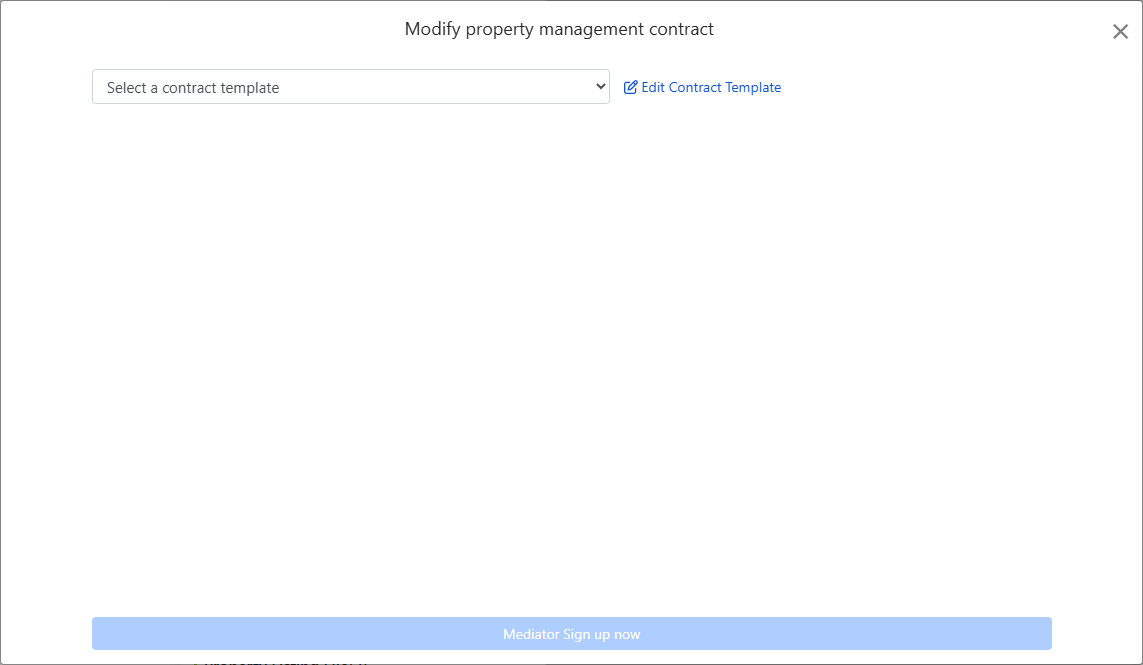
After selecting a template, the data you entered previously will auto-fill the contract fields: owner name, address, property name, date, signature fields, and company seal (upload stamp image in the organization info settings). No need to re-enter.
Signature
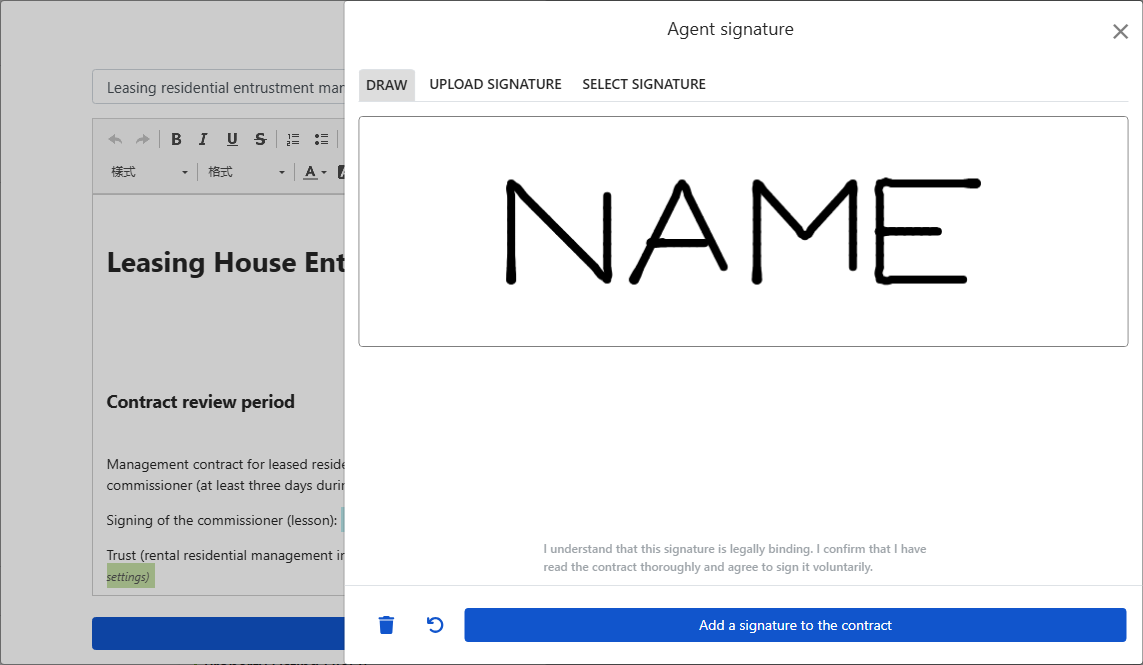
When it's your turn to sign, you can draw, upload a signature image, or use a saved signature. Confirm you've read and voluntarily sign the contract before adding your signature.
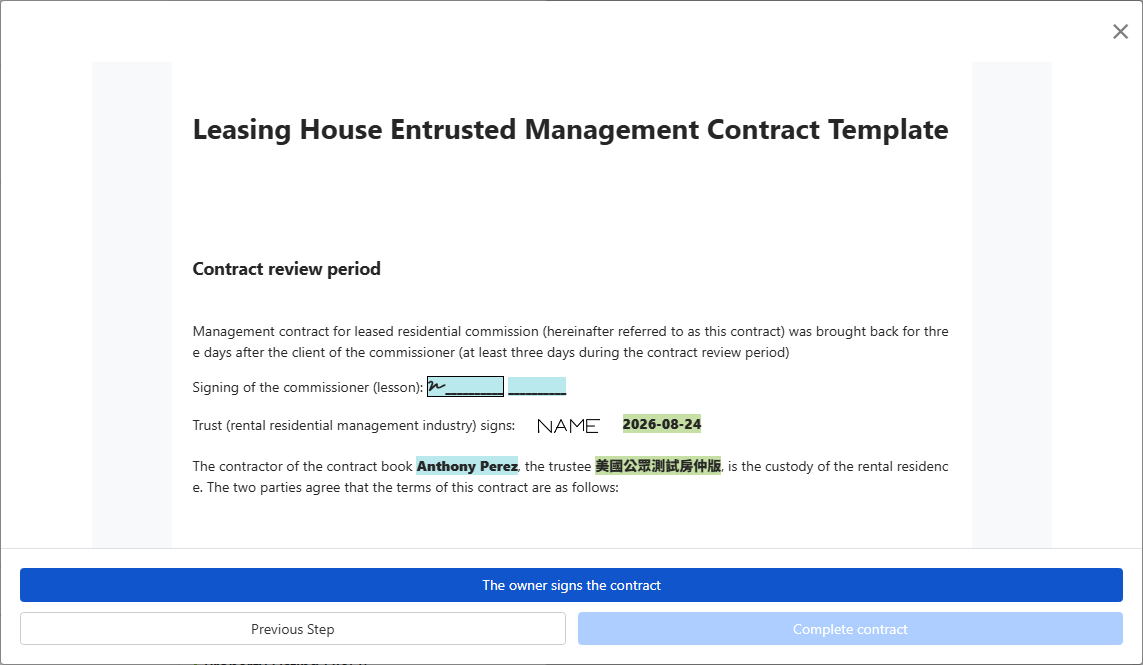
After confirming contract accuracy, click to send it to the owner. Once signed, the system generates and stores the complete contract PDF for both parties.
What will you see after completion?
Return to the property management page. The newly created property will appear on the left list. The card shows the owner's name, lists units and rent details, with status as vacant.
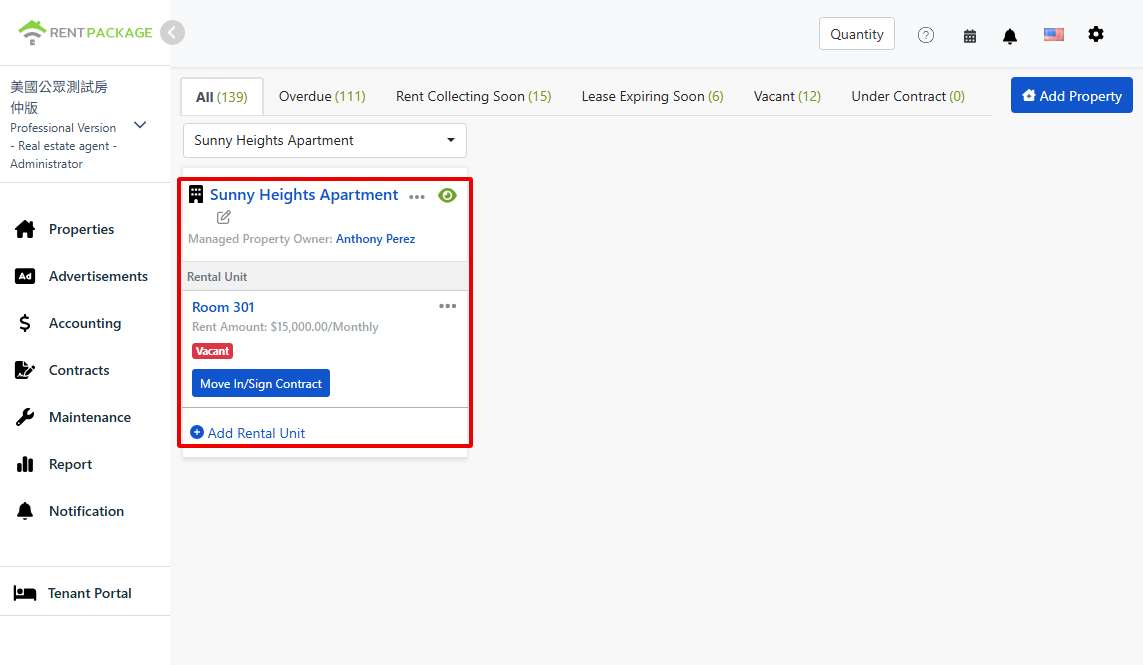
Next, you can either click 'Move In/Contract' for units to arrange tenants or 'Add Unit' to include additional rooms.
View/Modify Owner Contract
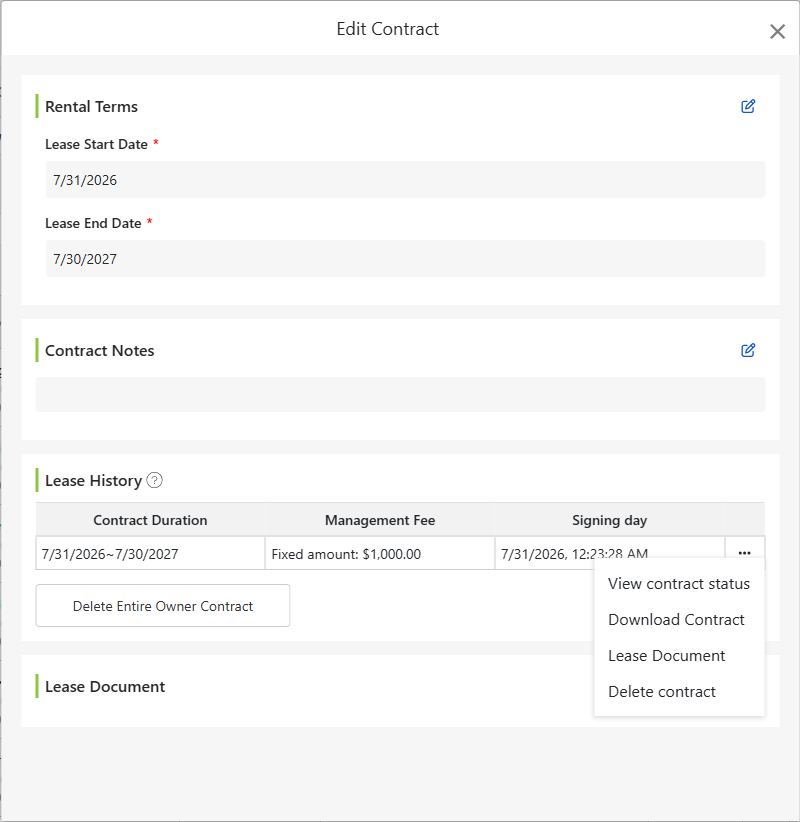
The owner contract signed when adding a property can be viewed and modified anytime: Click 'Contracts' in the left menu, select 'Owner Contracts', find the contract under the owner's tab, click 'More' on the right, and choose 'View Owner Contract'.
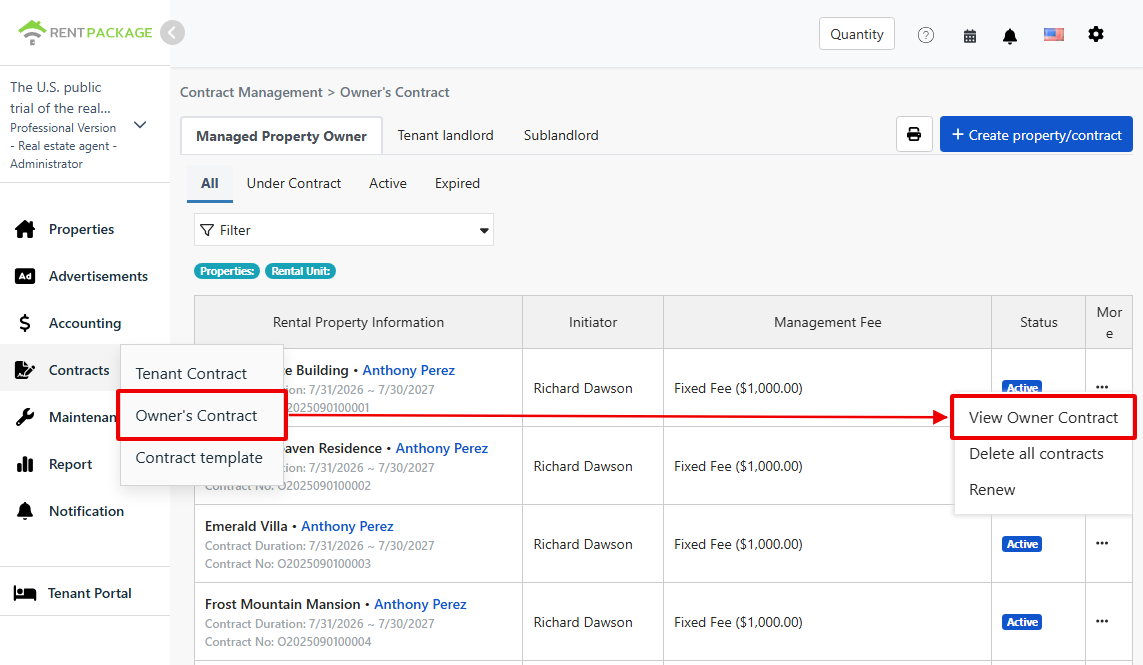
Once opened, you can directly modify the start/end dates and add contract notes. Lease history shows the term, management fee, and signing date with options on the right for status view, document opening, or deletion. Upload related files to the contract document section for centralized management.
Modify Management Fee: Property default rate and limits.
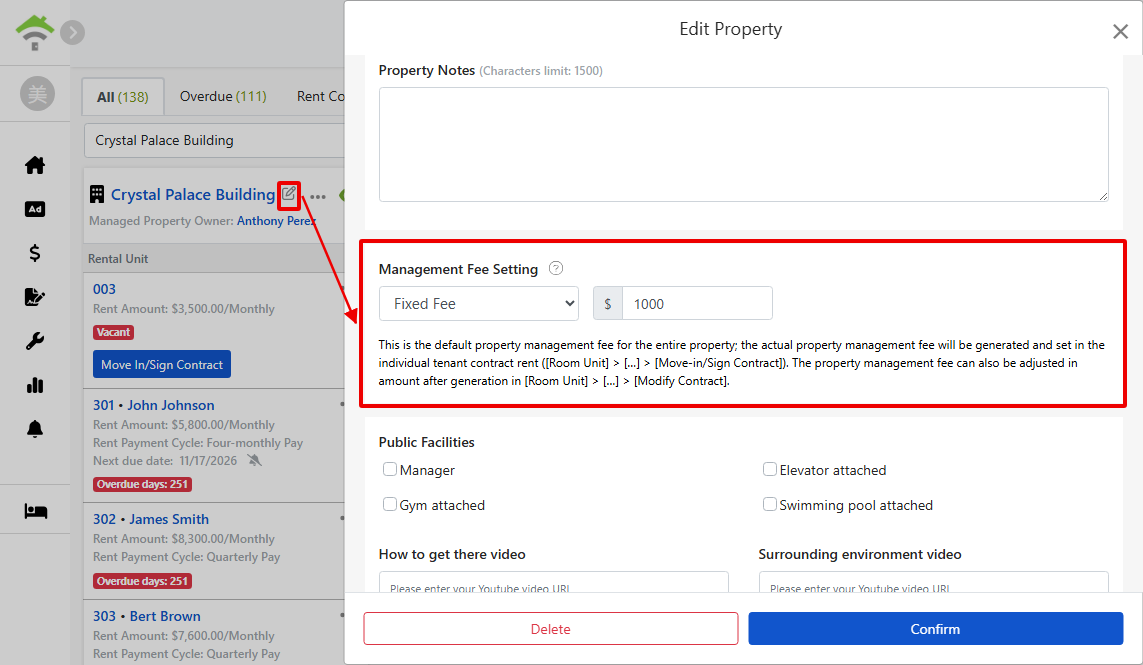
To adjust property management fees, click the edit icon next to the property name in the list. Open the edit property window to the management fee section: Switch billing mode (fixed fee, percentage, percentage plus fixed fee), modify percentage or amount, and set min/max amounts per period, e.g., 10% of rent, but a min of $400 and max of $20,000.
FAQs
I manage my property and others'. Do I need two accounts?
No. One account can handle four roles at once. Select the appropriate role when adding a property: self-managed, agency-managed, subletting, etc., managed within the same account.
What is account initialization? Is it mandatory?
Account initialization is for users migrating from Excel or other systems: If an owner's trust account has an existing balance not yet paid out, enter the start date and amount to calculate the correct balance. For new properties without a prior balance, keep it off; it's not mandatory.
Must all units be created at once?
No. Add units in part; after property creation, add rooms, parking, or storefronts anytime via the property card.
Must contracts be signed online with owners?
No. The last option in signing methods is to add properties without contracts, suitable for pre-existing paper contracts; upload scanned documents to property files without affecting management functions.
Does it matter who signs first?
Choosing 'Owner signs first, then I sign' adds a layer of security: if the contract needs adjustments after the owner signs, it can be returned for re-signing without recreating the entire document. If certain about the terms, choosing 'I sign first' is quicker.